
How to build a robot that “sees” with $100 and TensorFlow


https://www.oreilly.com/learning/how-to-build-a-robot-that-sees-with-100-and-tensorflow


Object recognition is one of the most exciting areas in machine learning right now. Computers have been able to recognize objects like faces or cats reliably for quite a while, but recognizing arbitrary objects within a larger image has been the Holy Grail of artificial intelligence. Maybe the real surprise is that human brains recognize objects so well. We effortlessly convert photons bouncing off objects at slightly different frequencies into a spectacularly rich set of information about the world around us. Machine learning still struggles with these simple tasks, but in the past few years, it’s gotten much better.
Deep learning and a large public training data set called ImageNet has made an impressive amount of progress toward object recognition. TensorFlow is a well-known framework that makes it very easy to implement deep learning algorithms on a variety of architectures. TensorFlow is especially good at taking advantage of GPUs, which in turn are also very good at running deep learning algorithms.

Building my robot

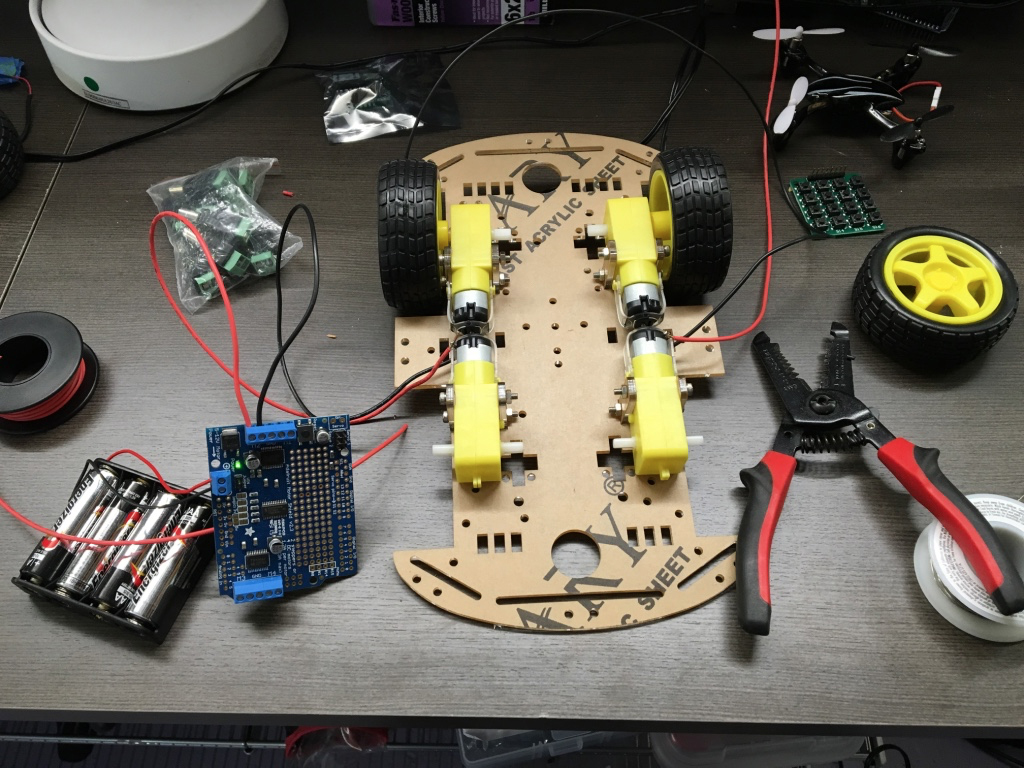
I wanted to build a robot that could recognize objects. Years of experience building computer programs and doing test-driven development have turned me into a menace working on physical projects. In the real world, testing your buggy device can burn down your house, or at least fry your motor and force you to wait a couple of days for replacement parts to arrive.
Get O'Reilly's AI newsletter
Architecture of the object-recognizing robot
Figure 1. Architecture of the object-recognizing robot. Image courtesy of Lukas Biewald.
The new third generation Raspberry Pi is perfect for this kind of project. It costs $36 on Amazon.com and has WiFi, a quad core CPU, and a gigabyte of RAM. A $6 microSD card can load Raspberian, which is basically Debian. See Figure 1 for an overview of how all the components worked together, and see Figure 2 for a photo of the Pi.
Raspberry Pi
Figure 2. Raspberry Pi running in my garage. Image courtesy of Lukas Biewald.
I love the cheap robot chassis that Sain Smart makes for around $11. The chassis turns by spinning the wheels at different speeds, which works surprisingly well (see Figure 3).
Robot chassis
Figure 3. Robot chassis. Image courtesy of Lukas Biewald.
The one place I spent more money when cheaper options were available is the Adafruit motor hat (see Figure 4). The DC motors run at a higher current than the Raspberry Pi can provide, so a separate controller is necessary, and the Adafruit motor hat is super convenient. Using the motor hat required a tiny bit of soldering, but the hardware is extremely forgiving, and Adafruit provides a nice library and tutorial to control the motors over i2C. Initially, I used cheaper motor controllers, but I accidentally fried my Pi, so I decided to order a better quality replacement.
Raspberry Pi with motor hat and camera
Figure 4. Raspberry Pi with motor hat and camera. Image courtesy of Lukas Biewald.
A $15 camera attaches right into the Raspberry Pi and provides a real-time video feed I can use to recognize objects. There are tons of awesome cameras available. I like the infrared cameras that offer night vision.
The Raspberry Pi needs about 2 amps of current, but 3 amps is safer with the speaker we’re going to plug into it. iPhone battery chargers work awesomely for this task. Small chargers don’t actually output enough amps and can cause problems, but the Lumsing power bank works great and costs $18.
A couple of HC-SR04 sonar sensors help the robot avoid crashing into things—you can buy five for $11.
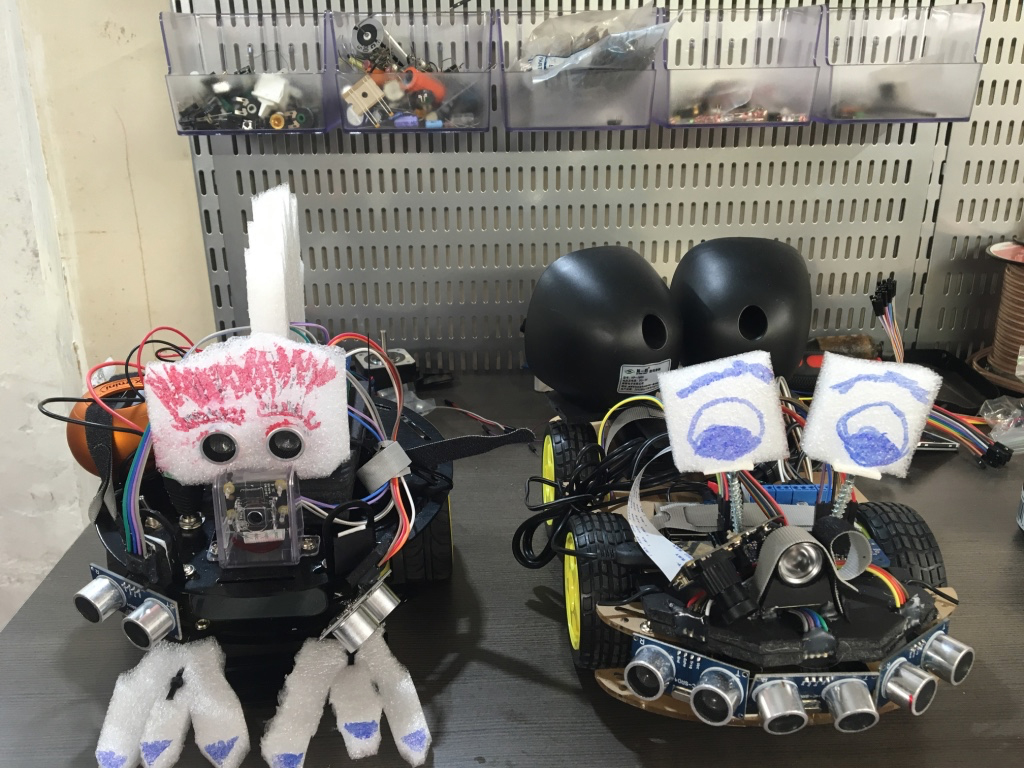
I added the cheapest USB speakers I could find, and used a bunch of zip ties, hot glue, and foam board to keep everything together. As an added bonus, I cut up some of the packaging materials the electronics came with and drew on them to give the robots some personality. I should note here that I actually built two robots (see Figure 5) because I was experimenting with different chassis, cameras, sonar placement, software, and so forth, and ended up buying enough parts for two versions.
My 4WD robot and her 2WD older brother
Figure 5. My 4WD robot (right) and his 2WD older sister. Image courtesy of Lukas Biewald.
Once the robot is assembled, it’s time to make it smart. There are a million tutorials for getting started with a Raspberry Pi online. If you’ve used Linux, everything should be very familiar.
For streaming the camera, the RPi Cam Web interface works great. It’s super configurable and by default puts the latest image from the camera in a RAM disk at /dev/shm/mjpeg/cam.jpg.
If you want to stream the camera data to a webpage (very useful for debugging), you can install Nginx, an extremely fast open source webserver/proxy. I configured Nginx to pass requests for the camera image directly to the file location and everything else to my webserver.
http {
   server {
      location / {
            proxy_pass http://unix:/home/pi/drive.sock;
         }
            location /cam.jpg {
                root /dev/shm/mjpeg;
         }
   }
}
I then built a simple Python webserver to spin the wheels of the robot based on keyboard commands that made for a nifty remote control car.
As a side note, it’s fun to play with the sonar and the driving system to build a car that can maneuver around obstacles.

Programming my robot

Finally, it’s time to install TensorFlow. There are a couple of ways to do the installation, but TensorFlow actually comes with a makefile that lets you build it right on the system. The steps take a few hours and have quite a few dependencies, but they worked great for me.
TensorFlow comes with a prebuilt model called “inception” that performs object recognition. You can follow the tutorial to get it running.
Running tensorflow/contrib/pi_examples/label_image/gen/bin/label_image on an image from the camera will output the top five guesses. The model works surprisingly well on a wide range of inputs, but it’s clearly missing an accurate “prior,” or a sense of what things it’s likely to see, and there are quite a lot of objects missing from the training data. For example, it consistently recognizes my laptop, even at funny angles, but if I point it at my basket of loose wires it consistently decides that it’s looking at a toaster. If the camera is blocked and it gets a dark or blurry image it usually decides that it’s looking at nematodes—clearly an artifact of the data it was trained on.
Robot plugged in
Figure 6. Robot plugged into my keyboard and monitor. Image courtesy of Lukas Biewald.
Finally, I connected the output to the Flite open source software package that does text to speech, so the robot can tell everyone what it’s seeing (see Figure 6).

Testing my robot

Here are my two homemade robots running deep learning to do object recognition.

Final thoughts

From 2003 to 2005, I worked in the Stanford Robotics lab, where the robots cost hundreds of thousands of dollars and couldn’t perform object recognition nearly as well as my robots. I’m excited to put this software on my drone and never have to look for my keys again.
I’d also like to acknowledge all the people that helped with this fun project. My neighbors, Chris Van Dyke and Shruti Gandhi, helped give the robot a friendly personality. My friend, Ed McCullough, dramatically improved the hardware design and taught me the value of hot glue and foam board. Pete Warden, who works at Google, helped get TensorFlow compiling properly on the Raspberry Pi and provided amazing customer support.

Comments

Popular posts from this blog

The Difference Between LEGO MINDSTORMS EV3 Home Edition (#31313) and LEGO MINDSTORMS Education EV3 (#45544)

http://robotsquare.com/2013/11/25/difference-between-ev3-home-edition-and-education-ev3/ This article covers the difference between the LEGO MINDSTORMS EV3 Home Edition and LEGO MINDSTORMS Education EV3 products. Other articles in the ‘difference between’ series: * The difference and compatibility between EV3 and NXT ( link ) * The difference between NXT Home Edition and NXT Education products ( link ) One robotics platform, two targets The LEGO MINDSTORMS EV3 robotics platform has been developed for two different target audiences. We have home users (children and hobbyists) and educational users (students and teachers). LEGO has designed a base set for each group, as well as several add on sets. There isn’t a clear line between home users and educational users, though. It’s fine to use the Education set at home, and it’s fine to use the Home Edition set at school. This article aims to clarify the differences between the two product lines so you can decide which

Let’s ban PowerPoint in lectures – it makes students more stupid and professors more boring

https://theconversation.com/lets-ban-powerpoint-in-lectures-it-makes-students-more-stupid-and-professors-more-boring-36183 Reading bullet points off a screen doesn't teach anyone anything. Author Bent Meier Sørensen Professor in Philosophy and Business at Copenhagen Business School Disclosure Statement Bent Meier Sørensen does not work for, consult to, own shares in or receive funding from any company or organisation that would benefit from this article, and has no relevant affiliations. The Conversation is funded by CSIRO, Melbourne, Monash, RMIT, UTS, UWA, ACU, ANU, ASB, Baker IDI, Canberra, CDU, Curtin, Deakin, ECU, Flinders, Griffith, the Harry Perkins Institute, JCU, La Trobe, Massey, Murdoch, Newcastle, UQ, QUT, SAHMRI, Swinburne, Sydney, UNDA, UNE, UniSA, UNSW, USC, USQ, UTAS, UWS, VU and Wollongong.

Building a portable GSM BTS using the Nuand bladeRF, Raspberry Pi and YateBTS (The Definitive and Step by Step Guide)

https://blog.strcpy.info/2016/04/21/building-a-portable-gsm-bts-using-bladerf-raspberry-and-yatebts-the-definitive-guide/ Building a portable GSM BTS using the Nuand bladeRF, Raspberry Pi and YateBTS (The Definitive and Step by Step Guide) I was always amazed when I read articles published by some hackers related to GSM technology. H owever , playing with GSM technologies was not cheap until the arrival of Software Defined Radios (SDRs), besides not being something easy to be implemented. A fter reading various articles related to GSM BTS, I noticed that there were a lot of inconsistent and or incomplete information related to the topic. From this, I decided to write this article, detailing and describing step by step the building process of a portable and operational GSM BTS. Before starting with the “hands on”, I would like to thank all the pioneering Hackers and Researchers who started the studies related to previously closed GSM technology. In particul